I’m so excited about this Halloween project, it turned out even better than I’d envisioned.
It’s the quintessential MPMK project – easy enough for kids of all ages to get in on the action and the finished product is a decidedly stylish take on traditional Halloween decor.
And did I mention how inexpensive it is?

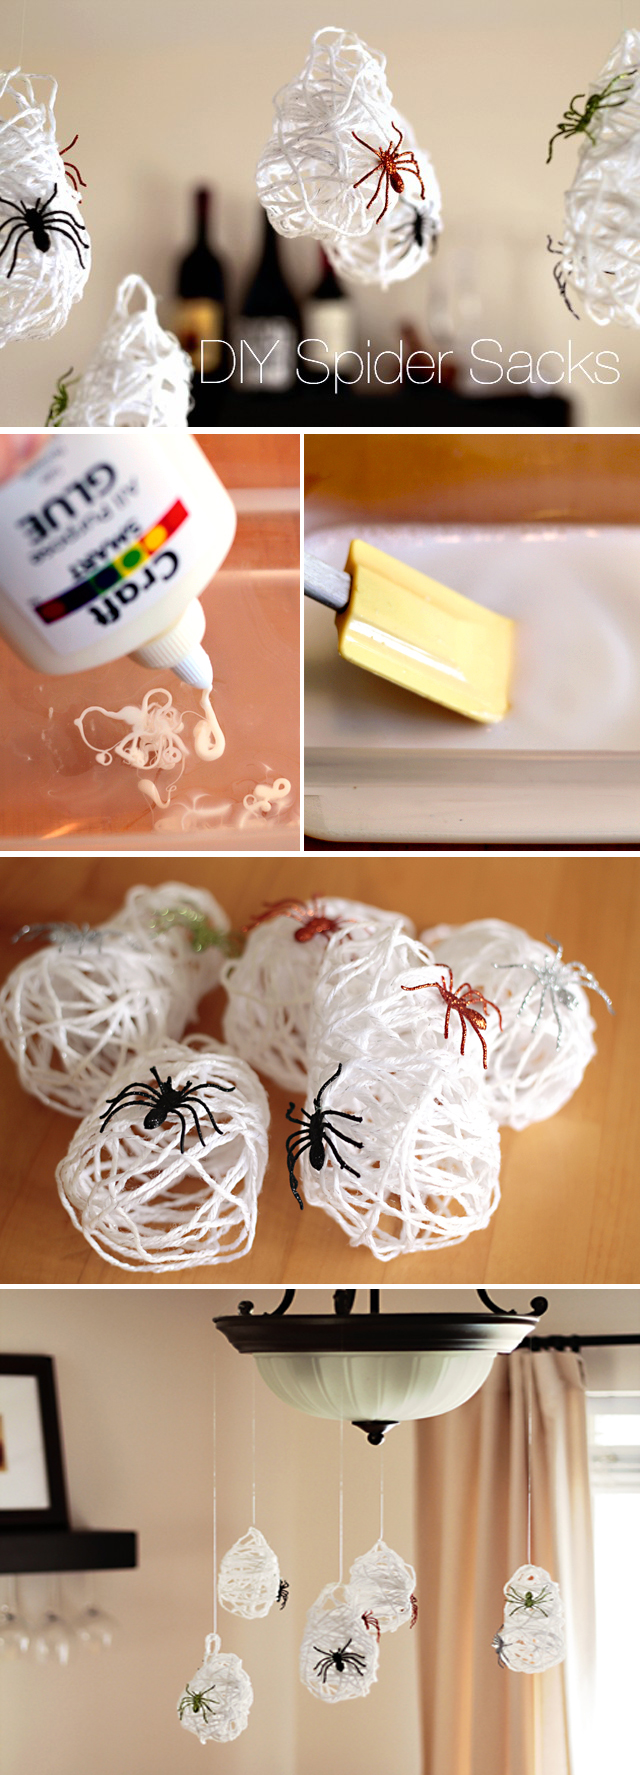
The basic materials include a pack of water balloons ($1.99), yarn ($3.79), and standard craft glue (already had it but glue should be on back-to-school sale right now). That’s it for the essentials.
To really get the full effect, it’s nice to add a few plastic spiders which are on sale pretty much everywhere. Also, to make my sacks glisten like the real thing I opted for white yarn laced with silver strands.

To make the sacks, I simply adapted this yarn ball tutorial. The first step is to create a mixture of water and glue.
The perfect glue to water ratio is somewhat of a mystery but you want to err on the side of more glue versus less.

Next, approximate how much yarn you’ll need to cover your balloon and wrap it around you hand to create a loop (this helps prevent tangles).
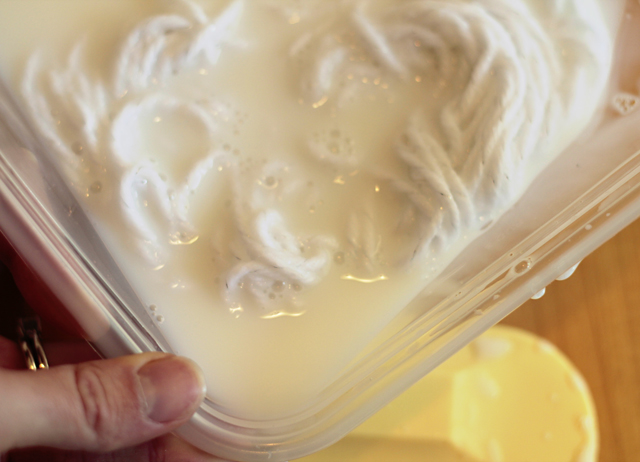
Then dunk it.

Now comes the really hard part, blowing up the water balloons. I like how the shape of these balloon aren’t perfectly round, like a spider sack, but they’re tough little buggars to inflate.
I’d highly suggest using some kind of a pump or air compressor if at all possible. At the very least, stretch the balloons out as much as your can first (I even filled a few with water and drained them before blowing them up).
You probably think I’m exaggerating – I’m not! These suckers are strong and MUCH harder to inflate than regular balloons.
Seriously, I was seeing stars with my head between my knees after each tiny balloon. After five I decided I had to quite for fear of passing out and leaving my rug rats to fend for themselves.
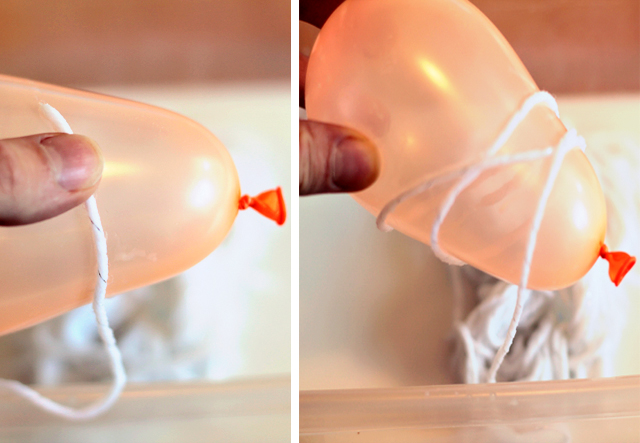
Once you (somehow by the grace of God) have your balloons inflated, squeeze the excess moisture from the yarn and start wrapping.

How dense you want to make your spider sack is completely up to you but the finished product should look something kind of like this.
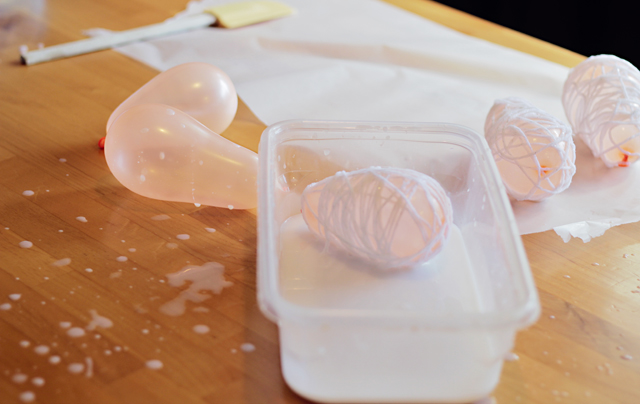
When you’re happy with your coverage, give the balloon one last roll in the mixture for good measure. (In case you’re wondering, I did do this project with C and he had one messy good time.
I didn’t include any photos of him because I put the camera away after documenting the first balloon. I think he appreciates it when I occasionally let him do a craft without sticking a camera in his face.)

Now comes the second hardest part, waiting around. These little guys take at least overnight to dry and possibly a lot longer.
I didn’t practice what I preach on this one and forgot to wring out the yarn before wrapping. As a result it took three full days for the yarn to dry out.

When the yarn is finally dry, all it takes is a needle or pin and – POP! – you have a spider sack. After popping the balloon, remove it and throw it away.
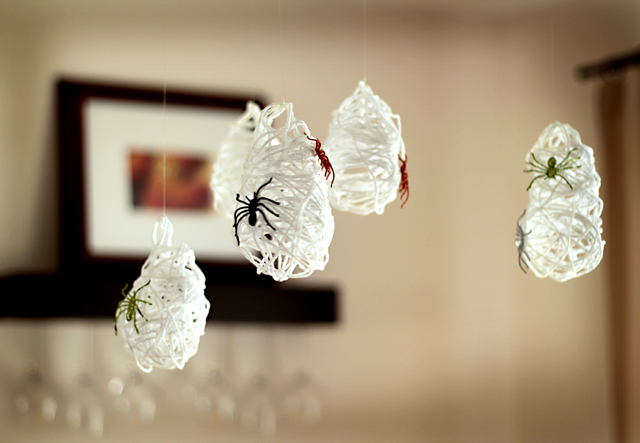
Now it’s time to decorate and hang.
I found these sparkly spiders at my local Ben Franklin Craft store, aren’t they fun?

You only need a very small amount of fishing wire tied around one leg to secure them.

I also tied a strand of fishing wire to the top of each spider sack for hanging purposes.

This is how they look suspended from the light fixture above our table. The fishing wire does a nice job of mimicking the silky thread of a spider in the light.
That’s it – pretty spooky right? I really hope you try this one!
More MPMK Halloween Crafts
Duct Tape “Wicked” Inspired Doormat
Halloween Paper Bag Luminaries
Simple Outdoor Halloween Garland
The post Handmade Halloween: Make Spider Sack Decor with the Kids appeared first on Modern Parents Messy Kids.


No comments:
Post a Comment