Are you struggling with what to do with all that art and school work coming through the door when the kids come home from school? Never fear – today Julee’s with us sharing a simple DIY project we think you’re going to love.
We create – and save – quite a bit of art at our house. With school just starting, the volume of paintings, drawings, and other crafts is only going to increase.
My current storage solution for keeping my children’s creations is to pile them on my desk until it becomes too much and I finally move them into a bin in a storage room. Not the best archival method since the bins aren’t accessible for immediate storage, nor are their contents labeled.
In thinking about what was my ideal solution, I had two requirements:
- Solve for both interim and long-term storage
- Engage my children in the storage of their art
The idea of a little artist’s portfolio immediately came to mind. My children love carrying their stuff in all sorts of containers, so I knew it would appeal to them while also giving me a place to stash and label things almost as soon as they are created.
Here are the materials you’ll need:

- 1-2 rolls of Scotch® Duct Tape.
- 1 roll of Scotch™ Chalkboard Tape or Scotch™ Dry Erase Tape
- 2 pieces of poster board (recommended size 14 x 22 inches)
- Scissors
- Ruler
- Chalk/chalk marker or dry erase marker/crayons
- Additional small piece of cardboard or card stock paper (approximately 4 x 6 inches)
The portfolio is super simple to make and, depending on the age of your children, they may be able to complete the project on their own.
Here are the steps I followed:

To create the sleeves, cut pieces of tape to match three sides of the poster board and tape the poster board together to form a sleeve.
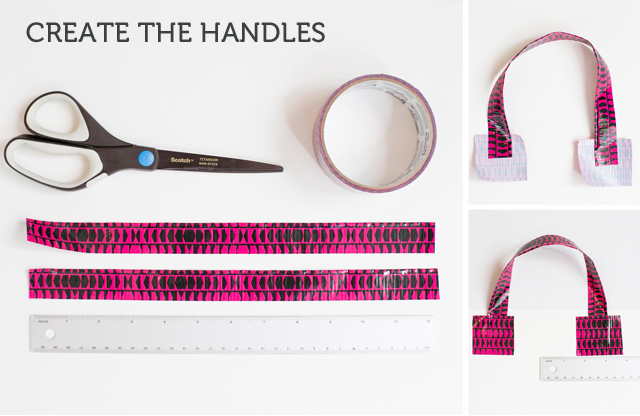
To create the handles, cut two pieces of tape approximately 12 inches each. Fold in half (lengthwise) to create the straps for the handles.
Measure the center of poster board and make a small mark in pencil.
Cut four squares of tape and place on each end of the straps. Tape the straps to the inside of each piece of poster board, making sure to position each end of the strap approximately 1 1/2 inches from center.
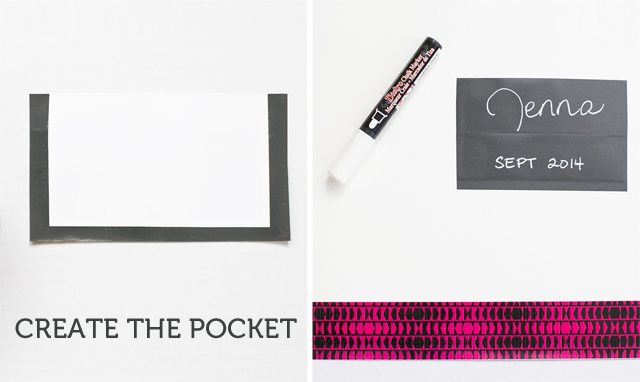
To create the outside pocket, which also serves as a label, cover your small piece of cardboard or card stock with two strips of either Scotch™ Chalkboard Tape or Scotch™ Dry Erase Tape. Leave a little excess tape around three of the sides in order to attach it to the portfolio.
Tape the pocket to the outside of the portfolio and add a label using the dry erase markers or chalk, depending on the tape you’re using. I chose to label each portfolio with my child’s name and the month and year of the artwork inside.
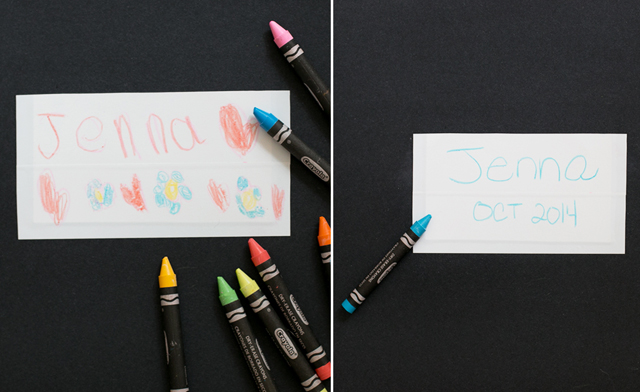
Working with the removable Scotch® tapes is great because you (or your children) can start with one label and then you can switch to a more descriptive label once you’re transitioning the portfolio to long-term storage. We wrote on the tape with dry erase crayons and the writing was easily cleared away with a swipe of a paper towel.
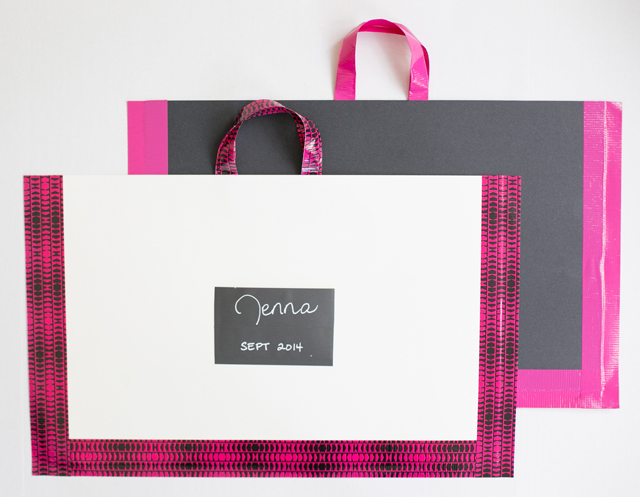
Now that I have these portfolios sitting on the shelves in my office, my children have a place to stash their art until I’m ready to move the labelled portfolios into our storage bins. Storage problem solved.

More from MPMK
Free Printable: The Organized Student Kit
The post Keep Kids’ Art Organized All Year with DIY Artist’s Portfolios appeared first on Modern Parents Messy Kids.


No comments:
Post a Comment